Re: StudioLive 16 Case
I think I've got the perfect solution, but it requires a little bit of custom work. (so not totally perfect) I've been around and around this issue and I am finally happy with what I've got. And best of all, it didn't cost me $600! Since I at the moment have nothing better to do with my time, I'm going to give step by step instructions to get a beautiful Studiolive case as well as photos of my finished product.
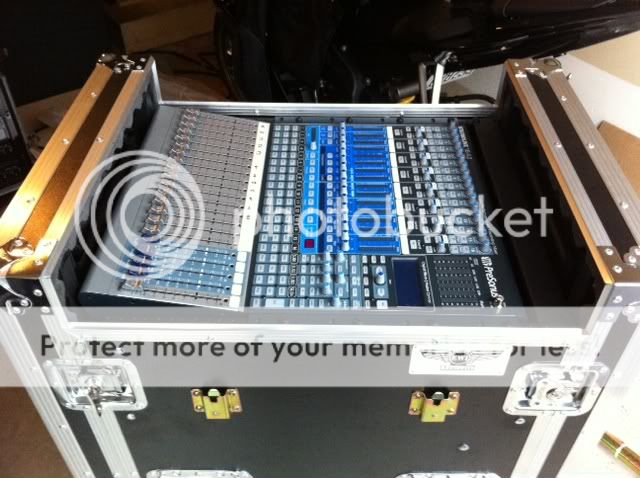
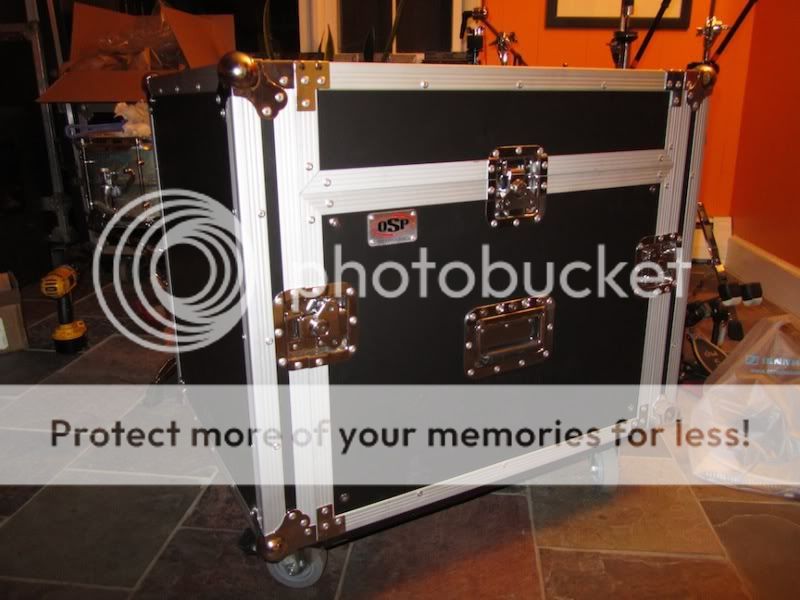
I bought an OSP MC12U-8 mixer/rack case. (there is also a 4 space available) These go for $320 on ebay but I found a company that sells them for $269 with free shipping through ubid.com. I was hesitant to sign up for a bidding website that I was unfamiliar with but I was able to pay with Paypal and when a big box showed up at my door a few days later, it put all my fears to rest. The direct email for the company I got it from is
[email protected]. No, I'm not affiliated with either of these companies.
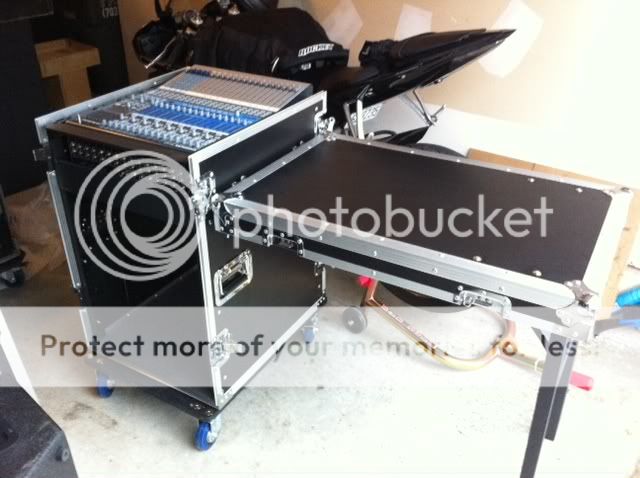
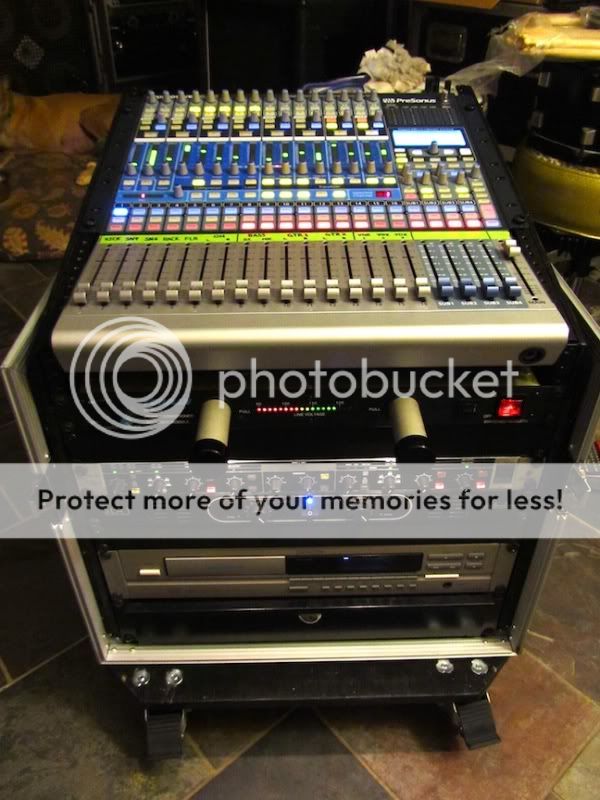
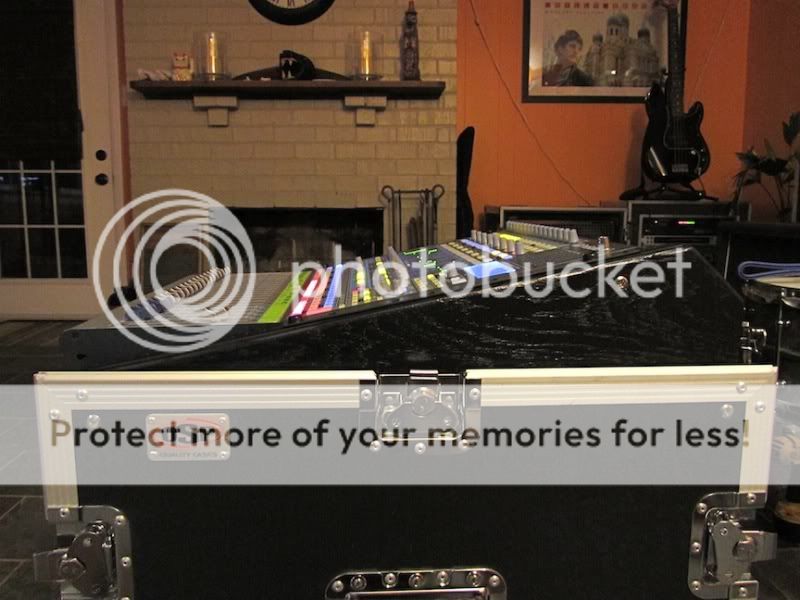
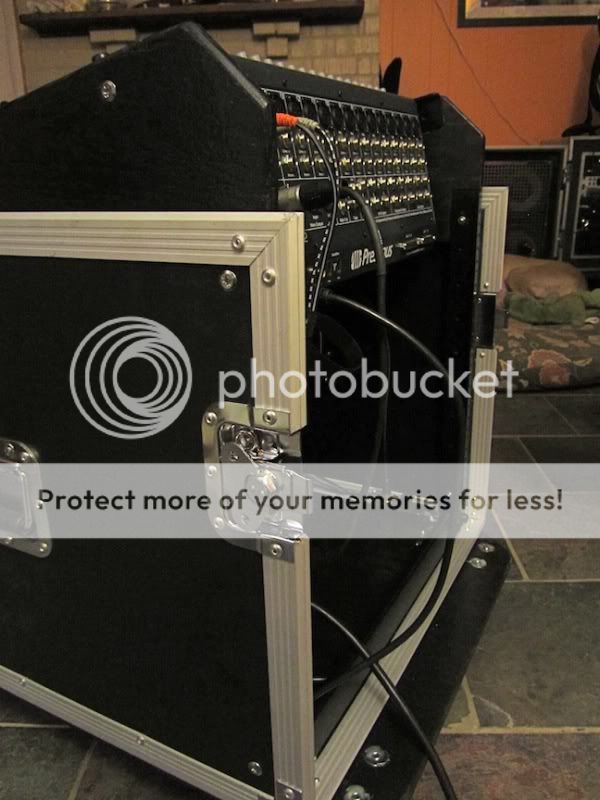
This case is a perfect fit for the dimensions of the console but the top rails are not steep enough, so much like the other failed cases the faders will tilt backwards. It also does not include a wheel board. To correct these flaws was relatively easy. I built a wheel board and new risers for the console to sit on. I have little to no woodworking experience, and I got it done in a weekend. Another plus to this case is that it has rear rack rails as well! This was important for me because I plan on enclosing the back completely and installing a fan panel.
Tools you will need: Circular saw, drill / bits, phillips screwdriver, crescent wrench, ruler.
Materials needed: 24x24 sheet of 5/16" plywood (use a hardwood. birch, maple, oak, etc.), sand paper, black spray paint.
1. Remove the existing risers from the top by removing the 2 phillips screws on each side. There are also a couple staples holding the pieces on. Just work it back and forth until it comes loose. Then remove the rack rails from the two pieces. (make sure you save all the screws, washers and bolts. You will reuse them)
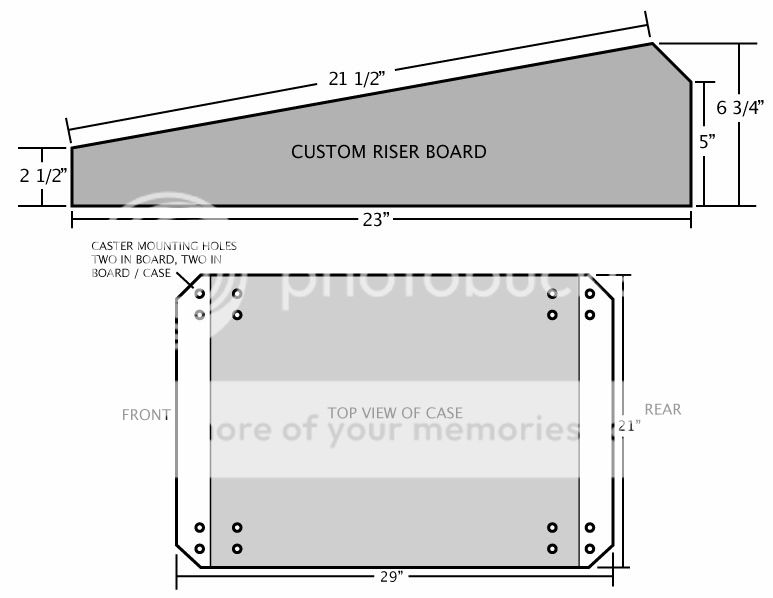
2. Measure and draw the new riser (I've attached a photo below with my measurements) onto the plywood. Cut it out with the circular saw. Go slow for a clean cut! After you cut the first piece, you can use it to trace the second piece. Cut the second piece.
3. Sand the edges of both pieces. If you're particular like me, you will want to make the outer edges nice and round for a finished look. Don't sand the bottom or front and rear edges, they will be lining up with the wood structure of the case.
4. Lay both pieces flat and paint with black spray paint. I found that two heavy coats were enough without using any primer. Make sure you paint them flat on the ground so the paint doesn't run. Do one side at a time letting them dry about an hour between coats or before flipping over.
5. Place both pieces into the empty slots in the case and line them up with the front and back. Find a drill bit that snugly fits the existing holes in the case and drill through them and into the new pieces you made one at a time. I attached a screw through the first hole in each piece so that they wouldn't move while drilling the second hole.
6. After attaching the new pieces, line up the rack rails so that they rise just above the top edge and so that they meet the top corner of the front rails. Mark the holes and drill them. Then install the rails using the original screws and bolts.
Done!
If you follow these instructions and measurements, you will have 9 useable spaces in the front with a 1/2 space under the console. I ordered a 1/2 space blank panel to close that up.
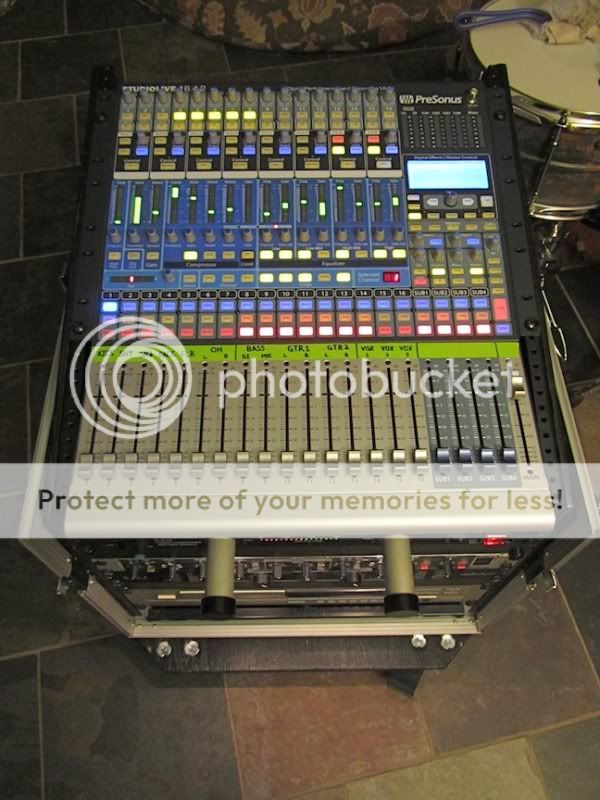
Here are the pics of the finished product and the measurements. If you want a wheel board, I'll put a brief description below the photos.
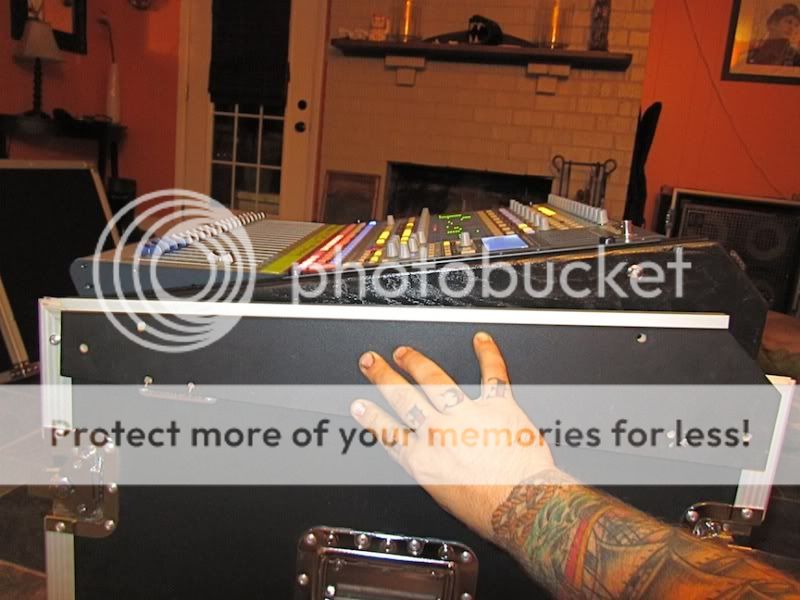
This one shows the old riser compared to the new ones.
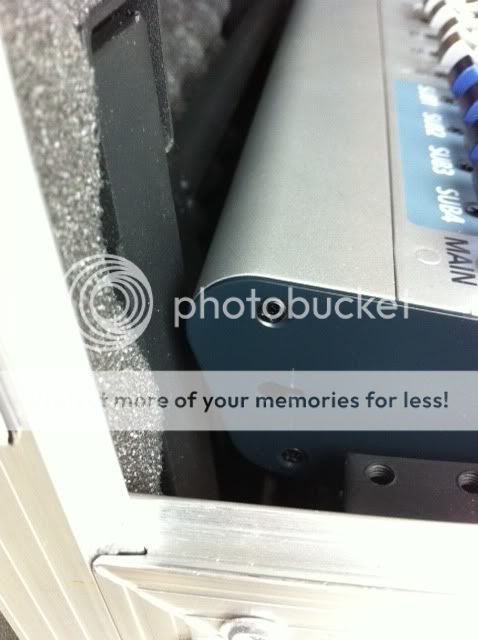
Notice there is plenty of room in the back for cable connections.
For the wheel board, you will need a circular saw, hammer, drill, ruler, clamps or liquid nails adhesive.
Materials: A sheet of hardwood 1/2" or thicker plywood large enough to make a 29"x21" board, sandpaper, black spray paint, 16 pronged Tee Nuts, 8 hex cap bolts long enough to go through the plywood AND the case bottom, 8 hex cap bolts long enough to go through the plywood only, four 3 1/2" rubberized caster wheels. I got mine from a caster company with two brakes for about $35. You can get them from any case company or special order from fastenal, or
do-it-yourselfroadcases.com.
1. Measure and cut the wheel board. The dimensions should be 29"x21". The grain should run the 29" length. Cut about 2" off of each corner so the ball ends of the lids don't touch the wheel board.
2. Sand the edges and paint with black spray paint. Again, two heavy coats. Paint with board lying flat to avoid runs.
3. Position case on the board and line it up so there is equal distance all around. Either clamp it on both sides so it doesn't move, or you can use liquid nails to glue the board to the bottom of the case if you never plan to remove it.
4. Lay one of the casters upside down on a piece of paper and trace the mounting plate as well as the holes. This will give you a template to work with when marking your holes on the case and board. After marking the holes, drill them out with a bit slightly larger than the diameter of the Tee Nuts. Each caster has 4 mounting holes. For every caster, the two holes on the side facing the case should be drilled through the case AND wheel board. The other two holes in the caster mounting plate that are closest to you should only go through the wheel board.
5. Hammer the Tee Nuts into the holes on the top side of the case. Then turn the case upside down and place the casters on. Attach them to the board by screwing the hex cap bolts into the Tee Nuts.
That's it! You now have a professional looking wheel board.
I hope this will be helpful to everyone. Just one musician with possible OCD trying to help another! 8)
-Matt